Hello,
I’m sure as developer you all already had the issue, when using Visual Studio’s projects referencing a local DLL not referenced at the same place than you.
It’s causing a lot of issue when you try to build, and so each time you work on this solution you have to first reference all DLL before starting to work.
A solution is to use a network drive and store your custom DLL in a repository.
But what if you don’t have the ability to receive from your organization a network drive? Or if you want to work from home and you don’t have a VPN access? Or …
Here again, Azure to the rescue!
With Azure, you’re able to create Azure File Share Storage, which allow you to store folders and files such as DLL.
So I will explain you in this post how to create and map your Azure File Storage to your machine to storage all your DLLs.
- First you must go on the Azure preview portal accessible here: https://portal.azure.com.
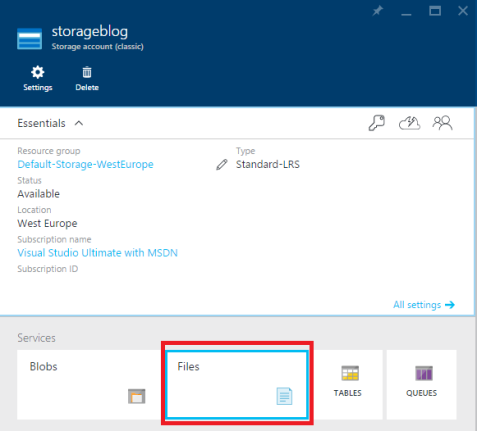
- Create a simple Azure Storage and open it
- Then select File as showed in the picture below :
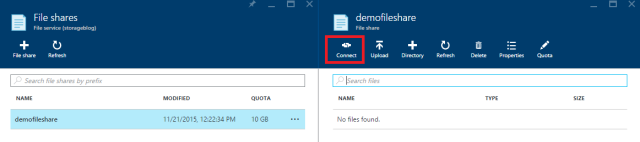
- Then select Files Shares and press the cross to add a new file share:

You can will be asked to enter the name of your file share and then the quota you want to assign to it. You can assign up to 5 TB.
You can now access your File Share and already create folders and upload files directly from the portal.
But if you click on connect you will receive a net use command to map your file share. Copy it.
Basically the net use command look like this:
net use [drive letter] \\[storagename].file.core.windows.net\demofileshare /u:[storagename] [storage account access key]
You have to keep in mind that this is using SMB 3.0 protocol to work, with the port 445. Please check if you can use the port 445 and you have a Windows version supporting the SMB 3.0 protocol.
| WINDOWS CLIENT | SMB VERSION SUPPORTS |
| Windows 7 | SMB 2.1 |
| Windows Server 2008 R2 | SMB 2.1 |
| Windows 8 | SMB 3.0 |
| Windows Server 2012 | SMB 3.0 |
| Windows Server 2012 R2 | SMB 3.0 |
| Windows 10 | SMB 3.0 |
- Now open a commander and run the command.
Example:
I will mount the drive with the letter Z:
net use z: \\storageblog.file.core.windows.net\devfileshare /u:storageblog [MYAZURESTORAGEKEY]
Ask all your developers to use the same letter when mounting the file share.
You can now then upload your DLL, reference them into your Visual Studio’s project and start to work!
